
Expert Tile Installater Salem Services for Stunning Homes
Understanding Tile Installater Salem Services
When embarking on a home improvement journey, selecting a professional tile installer can significantly impact the outcome of your project. In Salem, choosing the right Tile Installater Salem means enhancing aesthetics while ensuring durability and functionality in your spaces. From residential kitchens to commercial bathrooms, the expertise of a skilled tile installer is paramount. This article will delve deep into the various aspects of tile installation services in Salem, equipping you with knowledge to make informed decisions.
What Does a Tile Installater Do?
A tile installer specializes in laying tiles to create attractive floors, walls, and other surfaces. Their duties typically include:
- Assessment: Evaluating the area where tiles will be installed and providing recommendations based on the client’s needs and preferences.
- Material Selection: Assisting clients in selecting the right type of tile, whether ceramic, porcelain, glass, or natural stone, based on the location and purpose of the tiles.
- Surface Preparation: Preparing the substrate to ensure a level and stable foundation. This could involve cleaning, patching, and leveling the floor or wall.
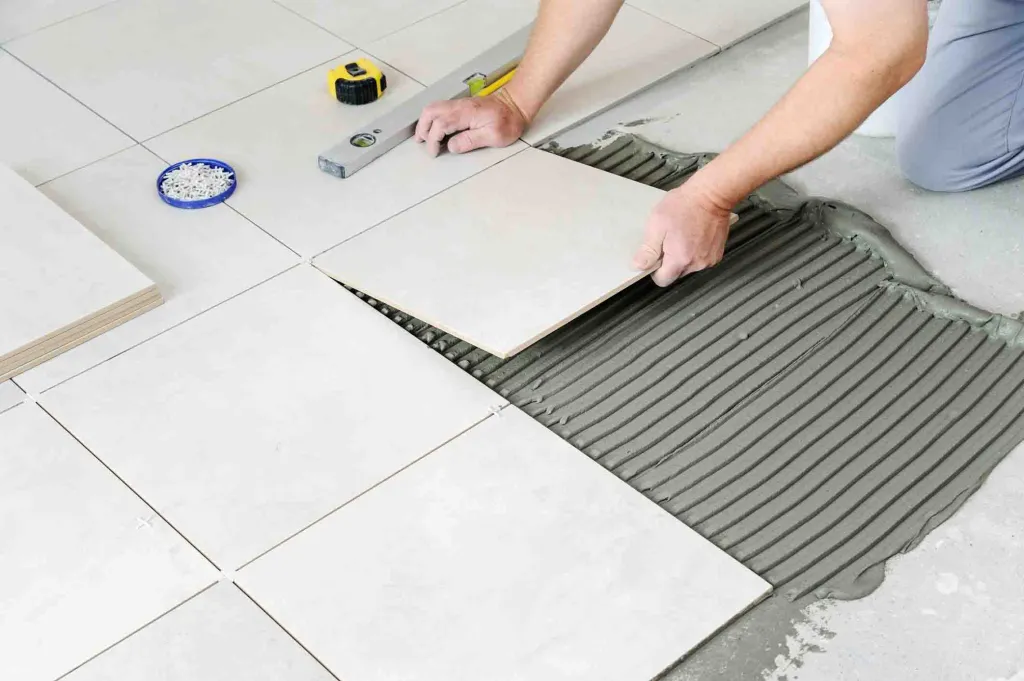
- Tile Installation: Precisely laying tiles according to predetermined patterns while ensuring proper spacing and alignment.
- Grouting and Sealing: Filling gaps between tiles with grout and applying sealants to protect the surfaces.
- Final Cleanup: Ensuring the job site is clean and presentable after completing the installation.
Benefits of Hiring a Professional Tile Installater Salem
While some homeowners may consider DIY options for tile installation, hiring a professional offers numerous advantages:
- Expertise: Professionals bring years of experience to the table, ensuring quality work that adheres to industry standards.
- Precision: Skilled installers can achieve intricate designs and patterns that may be challenging for amateurs.
- Time Efficiency: Professionals complete installations more quickly and efficiently than most DIY attempts.
- Quality Assurance: Many professional services offer warranties, providing peace of mind concerning the durability and workmanship of the installation.
Choosing the Right Tile for Your Project
The selection of tile plays a crucial role in the overall success of your installation. Here are some factors to consider:
- Location: Consider where the tile will be installed. Wet areas like bathrooms require water-resistant tiles, while high-traffic areas might benefit from more durable options.
- Style: Think about the aesthetic you want to achieve. Tiles come in various colors, patterns, and textures. Ensure the style complements your overall decor.
- Material: Choose between ceramic, porcelain, stone, or glass. Each material has its own set of benefits and drawbacks regarding cost, maintenance, and durability.
- Cost: Set a budget that considers both the material and installation cost. High-end tiles may look stunning but could stretch your budget beyond comfort.
Preparing for Tile Installation
Assessing the Work Area
Before installation, it’s vital to assess the area to ensure a successful project. Factors to evaluate include:
- Condition of Substrates: Ensure that floors and walls are stable, dry, and clean.
- Measurements: Accurate measurements prevent issues during installation and ensure you purchase the correct amount of tile.
- Access to Utilities: Consider any plumbing or electrical installations that need attention during the work.
Necessary Tools and Materials
A successful tile installation requires specific tools and materials. Key items include:
- Trowels: For spreading adhesive.
- Tile Cutters: For trimming tiles to fit edges and corners.
- Grout Float: For applying grout.
- Leveling Tools: Ensures tiles are laid evenly.
- Saws: If working with harder materials, a wet saw may be necessary.
Defining Your Budget and Timeline
Budgeting is a critical component of preparation:
- Estimate Costs: Include not just the tile, but also adhesive, grout, tools, and professional fees.
- Define Your Timeline: Establish a realistic timeline that allows for preparation, installation, and any required drying time.
Installation Process Explained
Step-by-Step Tile Installation
The installation process, when broken down into steps, becomes much easier to envision:
- Prepare the Surface: Ensure the surface is clean and dry.
- Layout Planning: Lay out tiles without adhesive to get an idea of the fitting and design.
- Apply Adhesive: Using a trowel, spread the adhesive in small sections.
- Lay Tiles: Place the tiles in the adhesive, using spacers for even spacing.
- Cut Tiles as Needed: Use a tile cutter for edges and corners.
- Grouting: Once the adhesive is dry, remove spacers and apply grout.
- Clean and Seal: Clean excess grout and seal the tiles for added protection.
Common Mistakes and How to Avoid Them
Even seasoned professionals can slip up. Common mistakes and solutions include:
- Poor Surface Preparation: Always ensure a clean, dry, and level surface before beginning.
- Improper Adhesive Application: Follow manufacturer instructions regarding the proper type and amount of adhesive.
- Ignoring Grout Maintenance: Regular sealing and cleaning of grout lines will prolong the life of your installation.
Best Practices for Achieving a Flawless Finish
For the best results, adhere to these practices:
- Use Quality Materials: Invest in good quality tile, adhesive, and grout to ensure longevity.
- Follow a Pattern: Consistency in laying tiles according to an established pattern is essential for aesthetics.
- Allow Proper Drying Time: Follow drying times as indicated by the adhesive and grout manufacturers.
Post-Installation Care for Your Tiles
Cleaning and Maintenance Tips
After installation, proper care is crucial to maintaining the look and integrity of your tiles:
- Regular Cleaning: Use a pH-neutral cleaner and a soft mop to clean regularly.
- Avoid Abrasives: Steer clear of harsh chemicals and scrubbers that could damage the finish.
How to Repair Damaged Tiles
Damaged tiles don’t always mean replacement. You can repair as follows:
- Fixing Cracks: Use appropriate filler to repair minor cracks and chips.
- Re-grouting: If grout is cracking or missing, re-grouting can restore the integrity and appearance.
Why Proper Sealing is Essential
Sealing tiles and grout is essential for their longevity:
- Water Resistance: Sealing prevents moisture penetration, which can lead to mold and mildew.
- Stain Prevention: Sealed surfaces are much easier to clean and resist staining.
Frequently Asked Questions
How long does tile installation typically take?
Tile installation can take one day to several days, depending on the size and complexity of the area. A professional can provide a detailed timeline after an assessment.
What types of tiles are best for bathrooms?
Porcelain and ceramic tiles are ideal for bathrooms due to their water resistance and durability. Textured options can provide better grip, enhancing safety.
Can I install tiles myself?
While DIY tile installation is feasible, hiring a professional ensures quality results and saves time, especially for intricate designs.
What should I look for in a tile installer?
Look for installers with experience, positive reviews, proper insurance, and a portfolio showcasing previous work to ensure reliable service.
How much does tile installation cost?
Costs vary widely based on materials, labor, and project scope, but professionals typically charge between $3 and $15 per square foot for labor.